City Chicken
City Chicken is a beloved American classic that has been enjoyed for generations. This dish, despite its name, contains no chicken at all. Instead, it features juicy pieces of pork, breaded to perfection, and served on skewers. In this article, we’ll explore the art of making City Chicken, step by step, and uncover the intriguing history behind this unique dish.
To make City Chicken, you’ll need the following ingredients:
| Ingredients | Quantity |
|---|---|
| Boneless pork, cubed (1 1/2-inch pieces) | 2 pounds |
| Salt, pepper, and seasoned salt | To your liking |
| Eggs | 4 |
| Milk | 3 tablespoons |
| Italian seasoned bread crumbs | 2 cups |
| Water | 2 cups |
| Vegetable oil (for frying) | 2 cups |
Additionally, you’ll need the following equipment:
- 14 (4-inch) skewers
- A 9×13-inch baking dish
- A wire rack
Directions for Making City Chicken
Threading and Seasoning
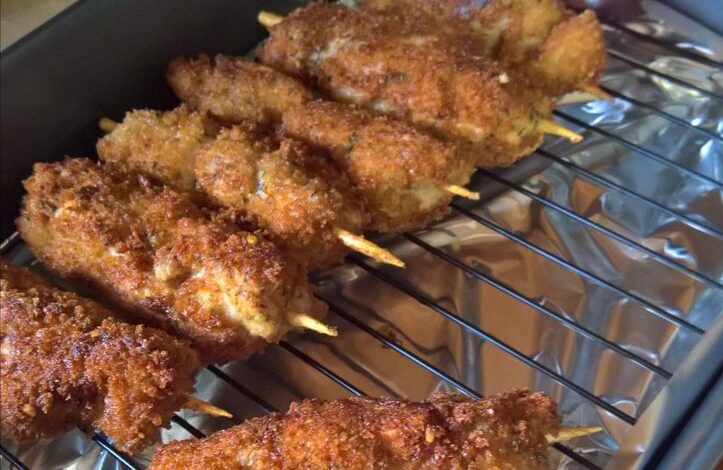
- Start by threading 2 to 3 pork cubes onto each skewer, creating your City Chicken skewers.
- Season the pork generously with salt, pepper, and seasoned salt.
Preparing the Coating
- In two shallow bowls, whisk together the eggs and milk in the first bowl.
- Fill the second bowl with the seasoned bread crumbs.
Setting Up for Frying
- Arrange a wire rack inside your baking dish and pour in water, ensuring the water level doesn’t touch the rack.
- Preheat your oven to 350 degrees Fahrenheit.
- Similarly, heat the vegetable oil in a deep-fryer or a large saucepan until it reaches 350 degrees Fahrenheit.
Coating and Frying
- Dive right into the coating process. First, submerge the skewers into the egg mixture, ensuring they are fully coated.
- After the egg mixture, dip the skewers into the breadcrumbs. For an extra crispy crust, double-dip them.
- Once well-coated, fry each skewer until it sports a gorgeous golden-brown shade, typically taking 3 minutes on each side.
Baking to Perfection
- Transfer the fried skewers onto the wire rack, ensuring they’re spaced apart.
- For the final touch, cloak the dish with aluminum foil.
- Bake in the preheated oven. 20 minutes should suffice until the pork loses its pinkish hue.
- To achieve the perfectly crispy crust, remove the foil and let it bake for an additional 10 minutes.
Serving City Chicken
- Serve immediately, and watch as everyone marvels at the deceptive delight that is the City Chicken.
History of City Chicken
City Chicken has a fascinating history. This dish originated in the United States, particularly in the Midwest and the Northeast. It was a clever solution to a shortage of chicken during the Great Depression. Since chicken was relatively expensive at the time, resourceful cooks turned to pork as an affordable substitute.
City Chicken quickly gained popularity for its economical nature and delicious flavor. It became a staple in many households and remains a cherished comfort food to this day.
Why It’s Called “City Chicken”
The name “City Chicken” is derived from the fact that it was a dish commonly enjoyed in urban areas, where the shortage of real chicken was more pronounced due to higher demand. The use of pork on skewers to mimic the appearance of chicken drumsticks gave rise to the name.
The Experience of Making City Chicken
Crafting City Chicken is not just about preparing a meal; it’s about connecting with a rich culinary history and indulging in a delicious, nostalgic experience. As you thread the pork onto skewers, coat it in the seasoned bread crumbs, and fry it to golden perfection, you’re taking part in a tradition that spans generations
City Chicken is more than just a dish; it’s a slice of culinary history. Originating during challenging times, this budget-friendly and flavorful creation has stood the test of time. Whether you’re making it for a family dinner or a special occasion, City Chicken is sure to delight your taste buds and provide a connection to a bygone era.
In summary, City Chicken is a classic American dish that embodies resourcefulness, flavor, and tradition. Its unique history and delicious taste make it a delightful addition to any table.