Almost all freezers have this “secret” element. That’s why it needs to be used once every 3 months
In the whirlwind of our daily routines, it’s easy to forget about the upkeep of our household appliances. We often take for granted that they’ll just keep working, especially those tucked away like our freezers. But lurking within most freezers is a “secret” element, a seemingly insignificant component that plays a vital role in its long-term health and efficiency. This often-overlooked feature needs attention roughly every three months to keep your freezer running smoothly and prevent potential problems.
Unveiling the Hidden Helper: What Is It and Where Is It?
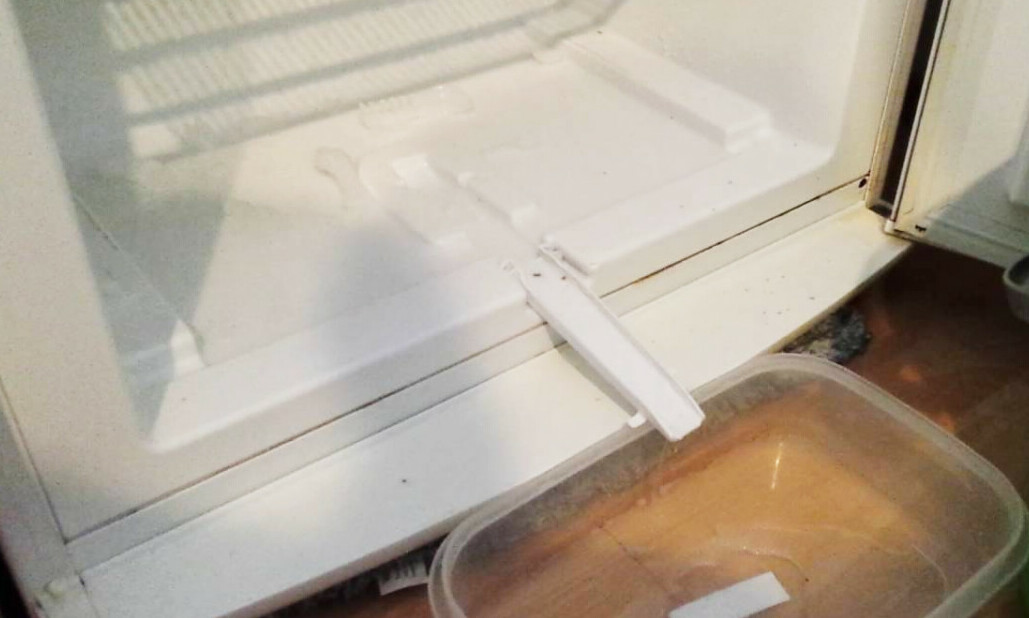
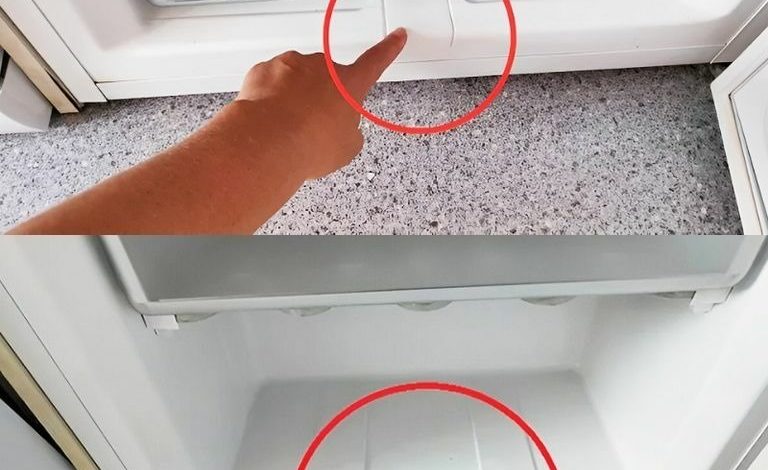
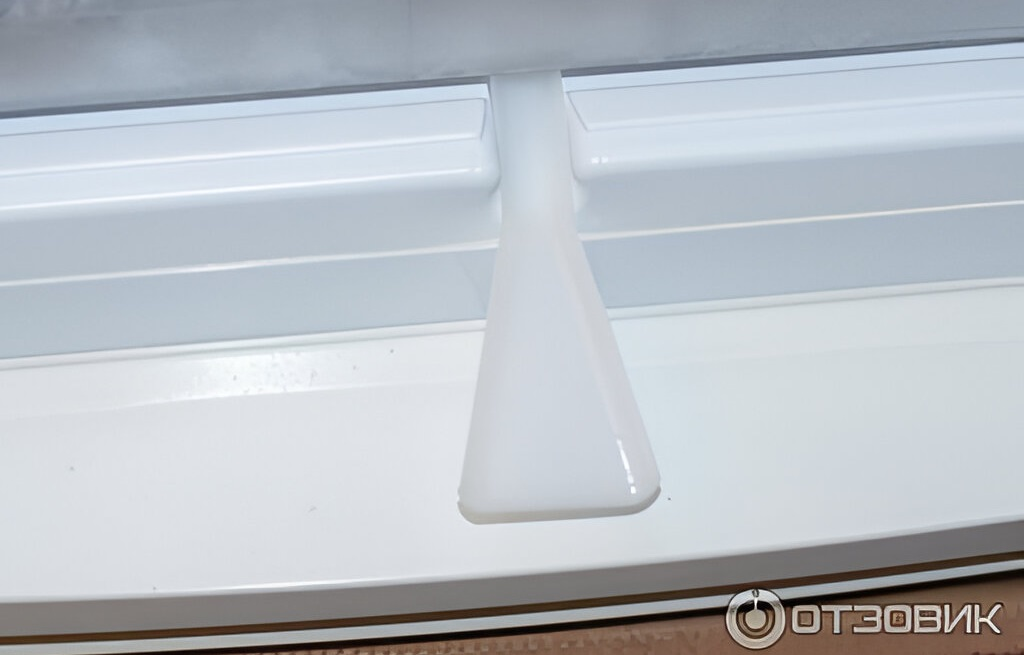
Take a closer look at your freezer. Somewhere near the bottom, you’re likely to find a small valve, a short tube, or perhaps even just a funnel-like opening. The exact appearance and location can vary depending on your freezer’s make and model. It might be partially hidden behind the bottom drawer, requiring you to remove it for access. Because it’s not immediately obvious, many people are completely unaware of its existence. This inconspicuous component is the key to proper defrosting and efficient freezer operation.
The Importance of Defrosting and Drainage
This seemingly simple feature plays a critical role during the defrosting process. Its purpose is to provide an outlet for the water that accumulates as ice melts. Without this drainage system, the melted water would have nowhere to go, potentially leading to leaks, ice buildup, and decreased freezer efficiency. Regular defrosting, facilitated by this drainage point, is crucial for preventing excessive ice accumulation, which can reduce the freezer’s storage capacity and force it to work harder, consuming more energy.
The Defrosting Process: A Step-by-Step Guide
To ensure your freezer operates at its peak performance, proper defrosting is essential. Here’s a detailed guide on how to utilize that “secret” element and effectively defrost your freezer:
-
Empty the Freezer: Remove all food items from the freezer and place them in a cooler or another temporary storage location to prevent thawing.
-
Power Down: Unplug the freezer from the electrical outlet. This is a crucial safety step before you begin the defrosting process.
-
Open the Door: Keep the freezer door wide open. This allows warm air to circulate inside, accelerating the melting process.
-
Prepare for Drainage: Position a shallow container, such as a baking dish or a shallow storage container, directly beneath the drainage valve or funnel. Make sure the container is large enough to hold the anticipated amount of melted ice.
-
Assist with Ice Removal (Optional): If you have a significant amount of ice buildup, you can gently loosen large chunks using a plastic scraper or spatula. Never use sharp objects like knives or screwdrivers, as these can damage the freezer’s interior.
-
Patiently Wait: Allow the ice to melt naturally. This process can take several hours depending on the amount of ice and the ambient temperature. Resist the urge to use heat or force to speed up the melting, as this could also damage the freezer.
-
Dispose of the Water: Periodically check the drainage container and empty it as needed to prevent overflows. Once all the ice has melted, dispose of the collected water.
-
Clean the Interior: After the defrosting is complete, use a solution of mild detergent and warm water to clean the interior surfaces of the freezer. This helps remove any residue and odors.
-
Dry Thoroughly: Use clean towels or paper towels to completely dry the interior of the freezer. This is a critical step to prevent refreezing and ice buildup.
-
Power Up and Restock: Once the interior is completely dry, plug the freezer back into the electrical outlet. Allow it to reach its proper temperature before restocking it with your frozen food items.
Watch step by step with photos below:
1.
2.